Agent Avatar
This Step by Step guide explains how you can customize your Voixt Agent Avatar and Agent Name.
- Go to all Agents and click on the personalization icon button.
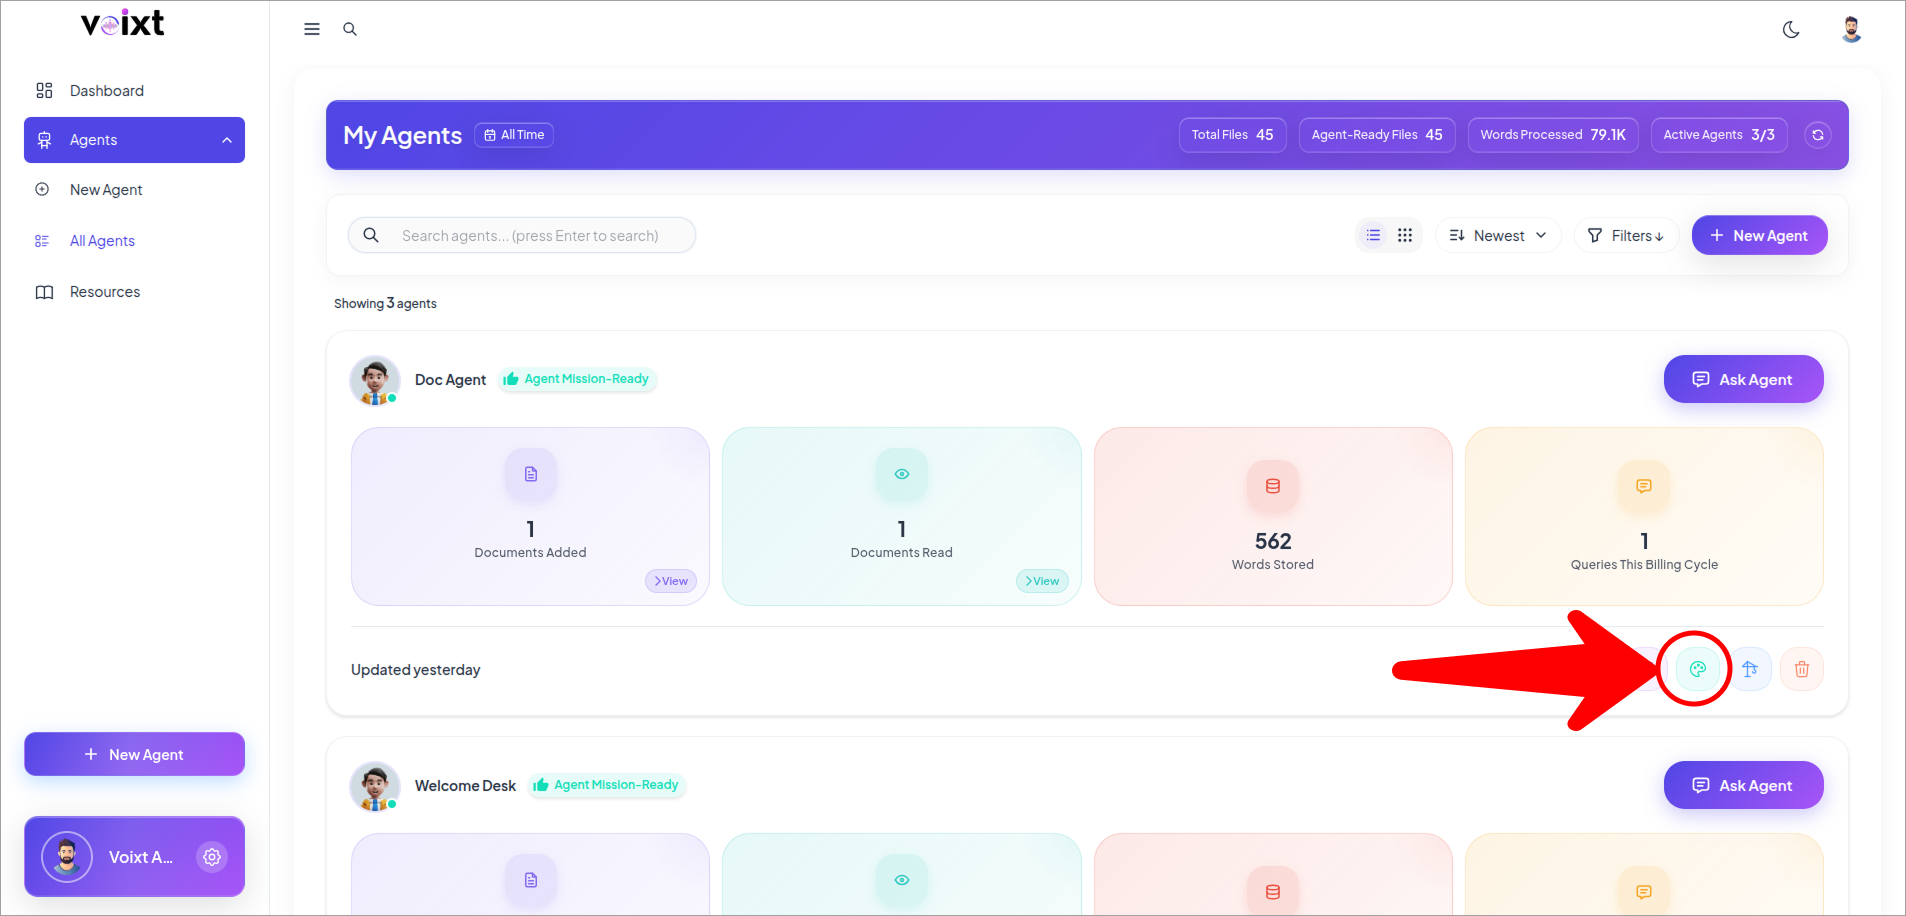
- It opens the General tab of the personalization.

Update Agent Name
Follow steps to update agent name.
- Here, write the agent name you want to update for your agent.
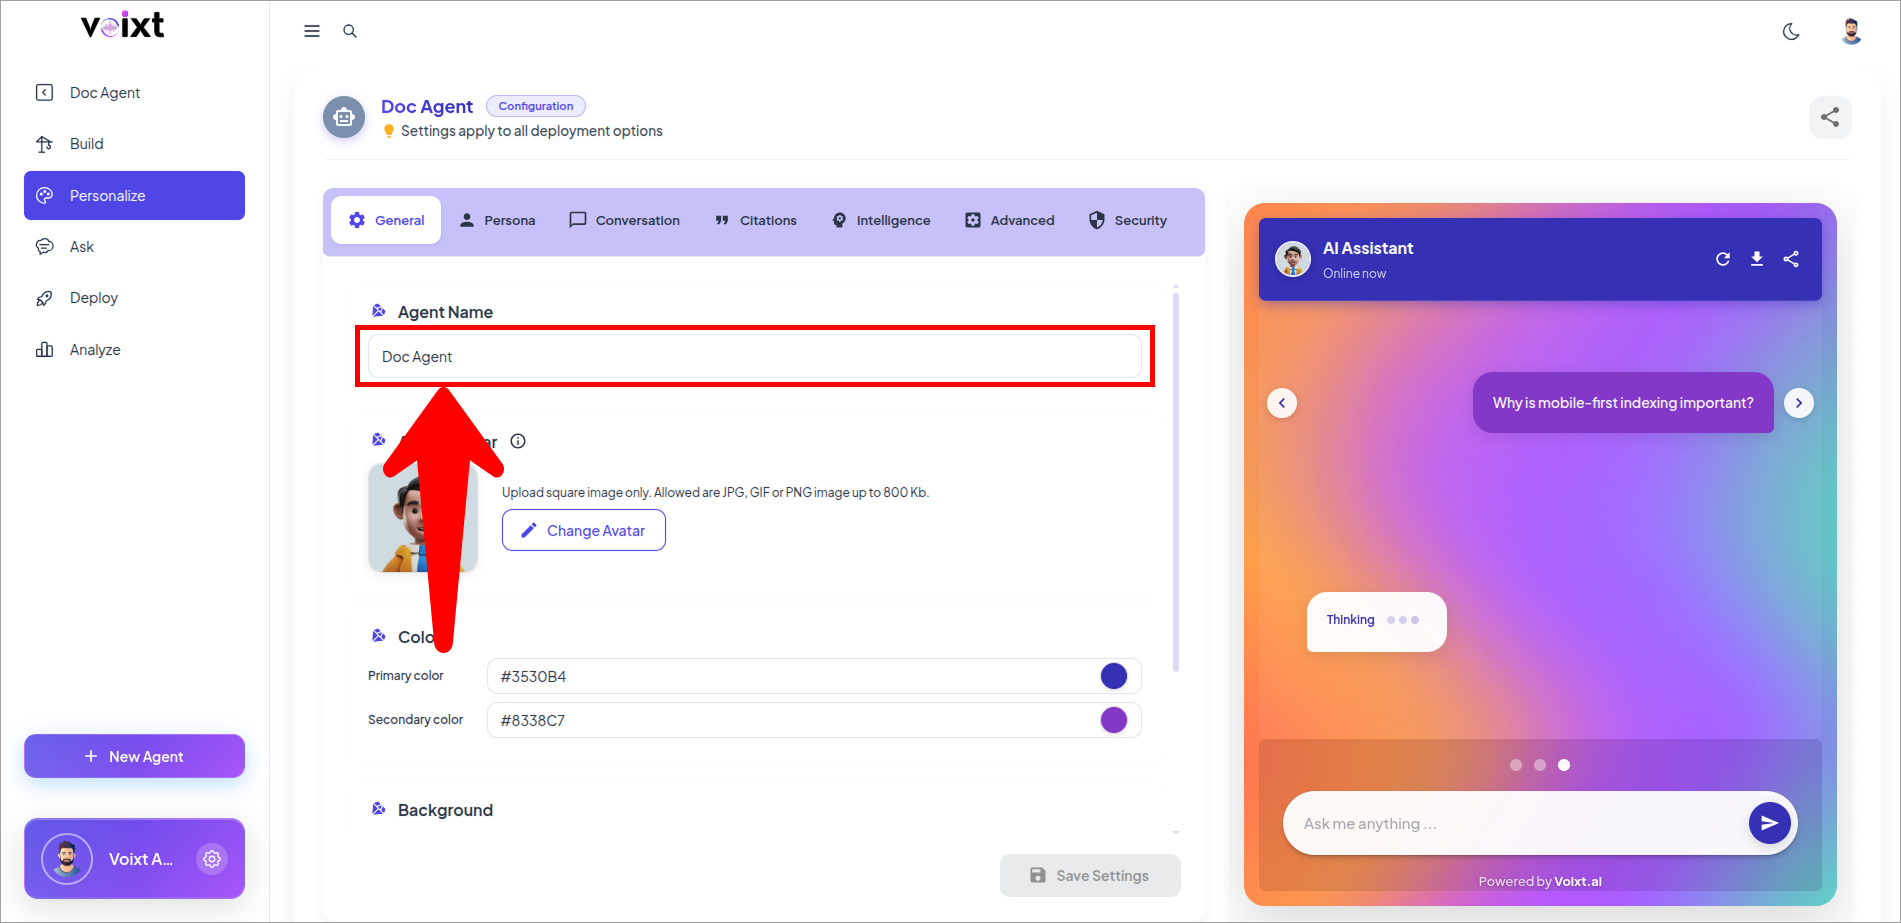
After updating Agent name scroll down to Step 6.
Update Agent Avatar
Follow process step by step to update agent's avatar.
- Click on Change Avatar button to update avatar of your agent.
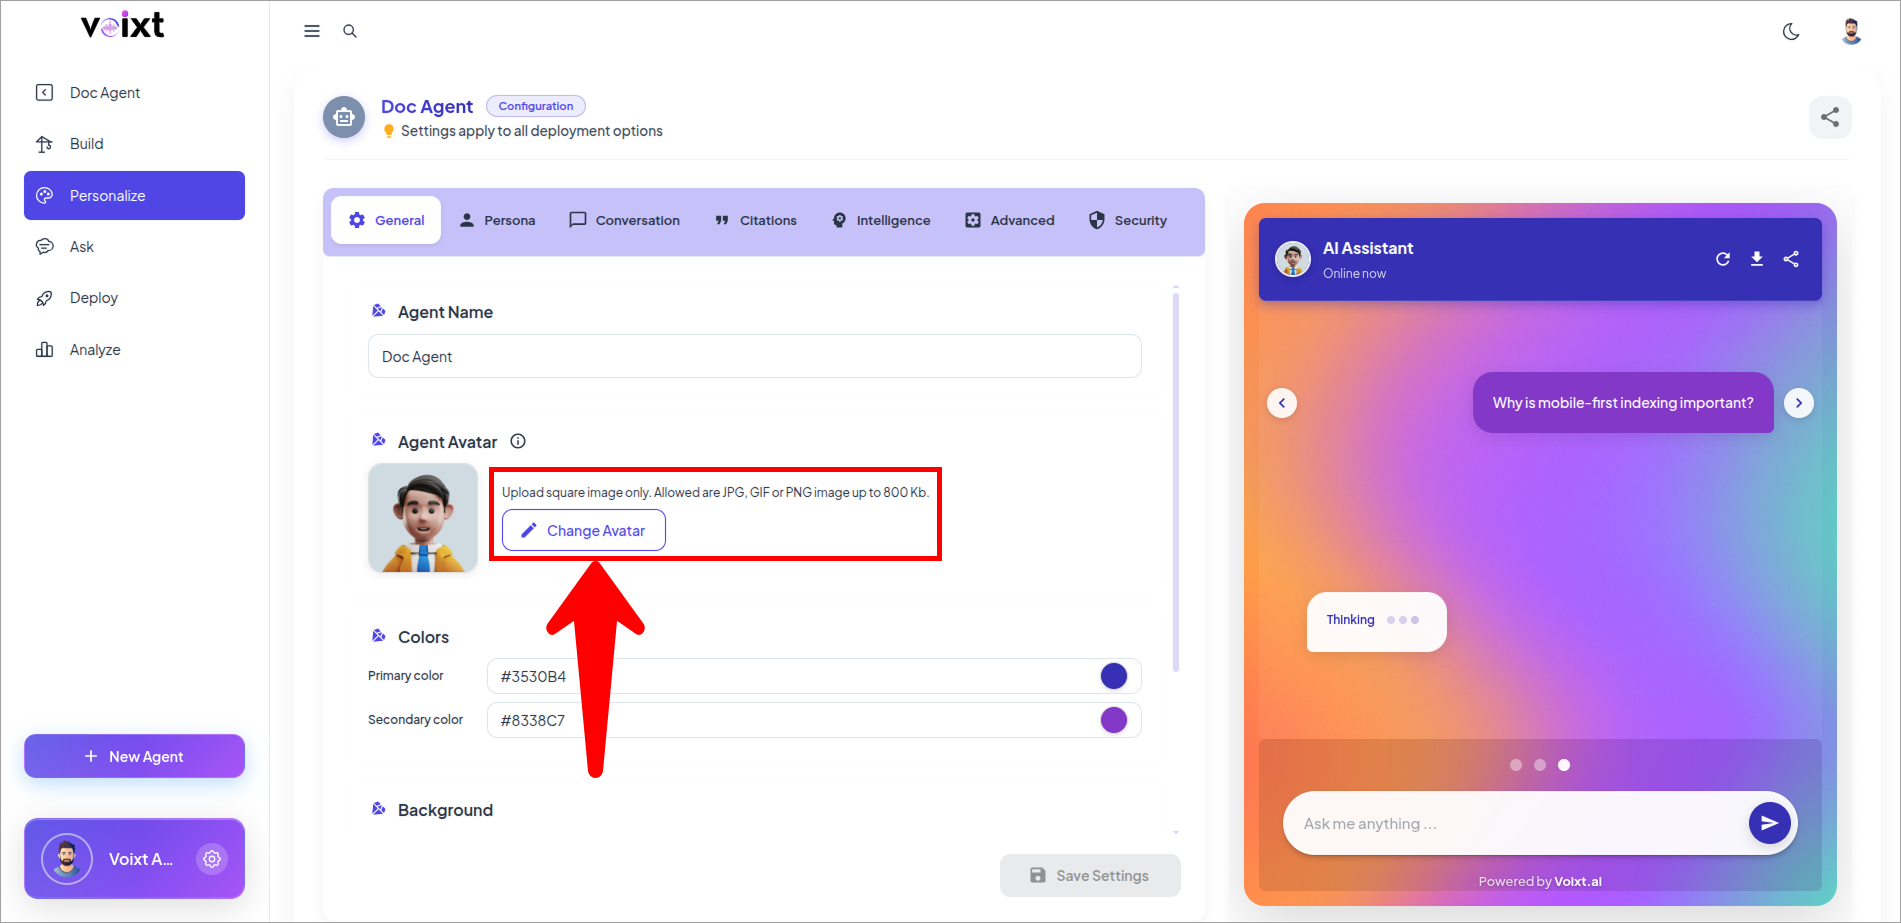
Upload image for your agent
- Check below right side panel there you can check ho it looks like.
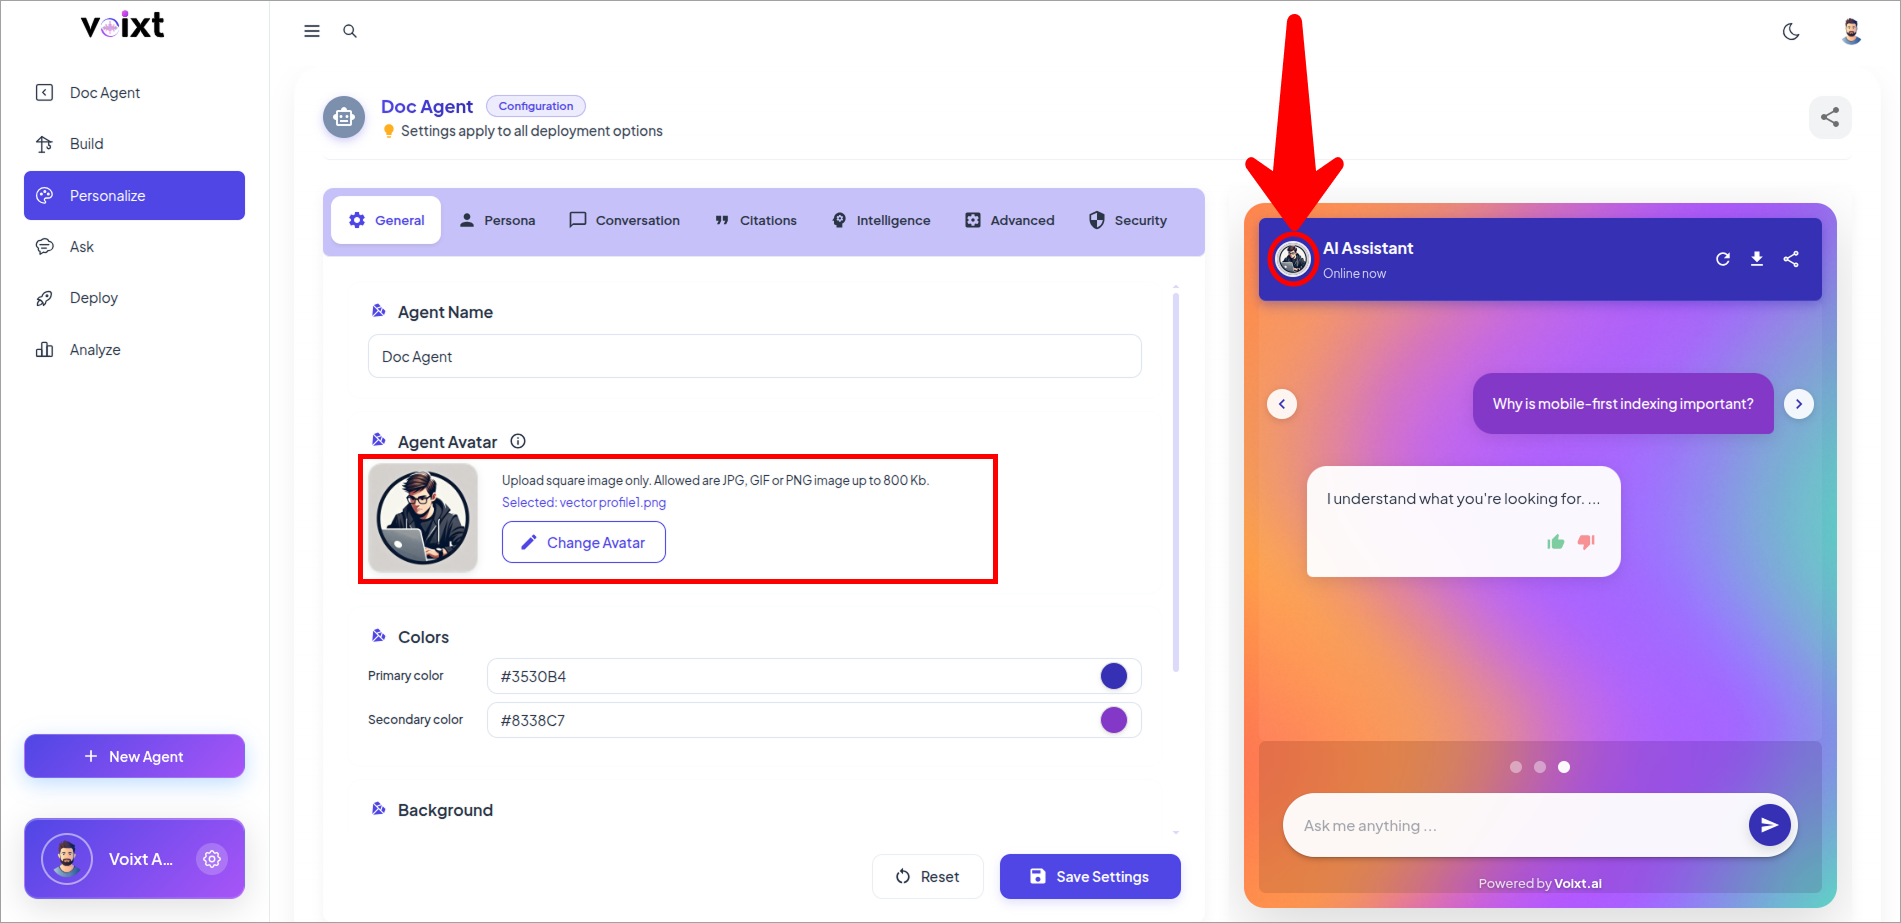
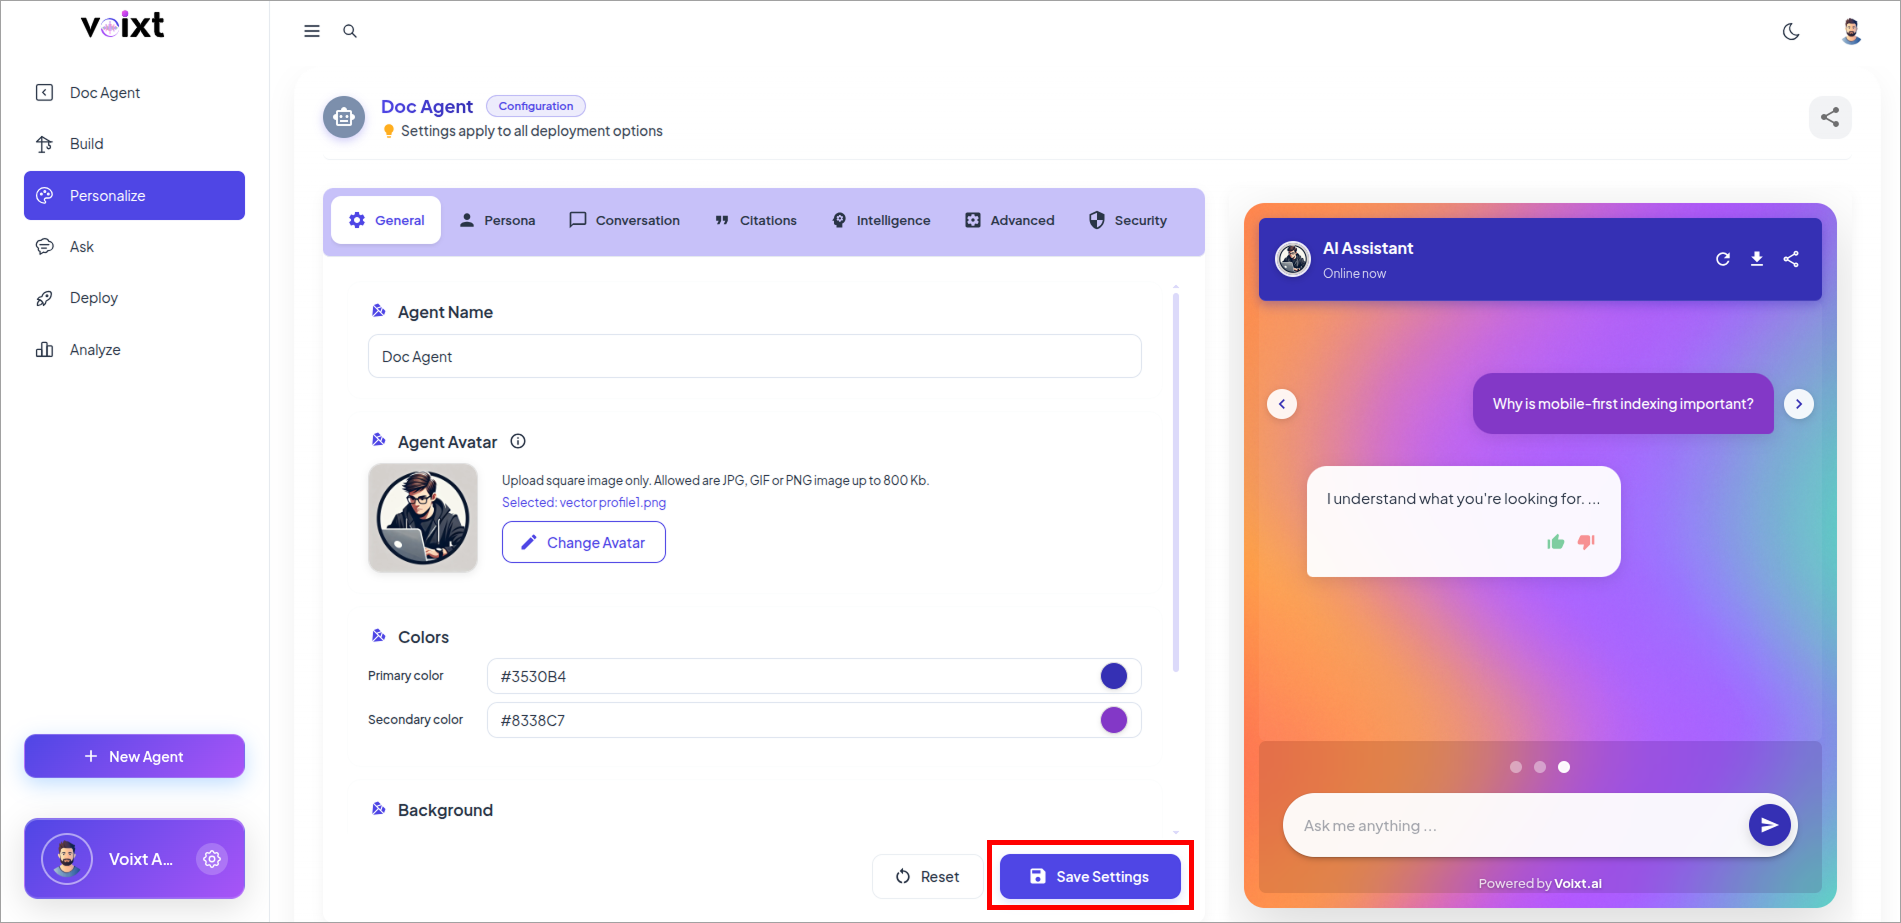
- Click on Save Settings to Save your Changes.