Create Wordpress Voixt Agent
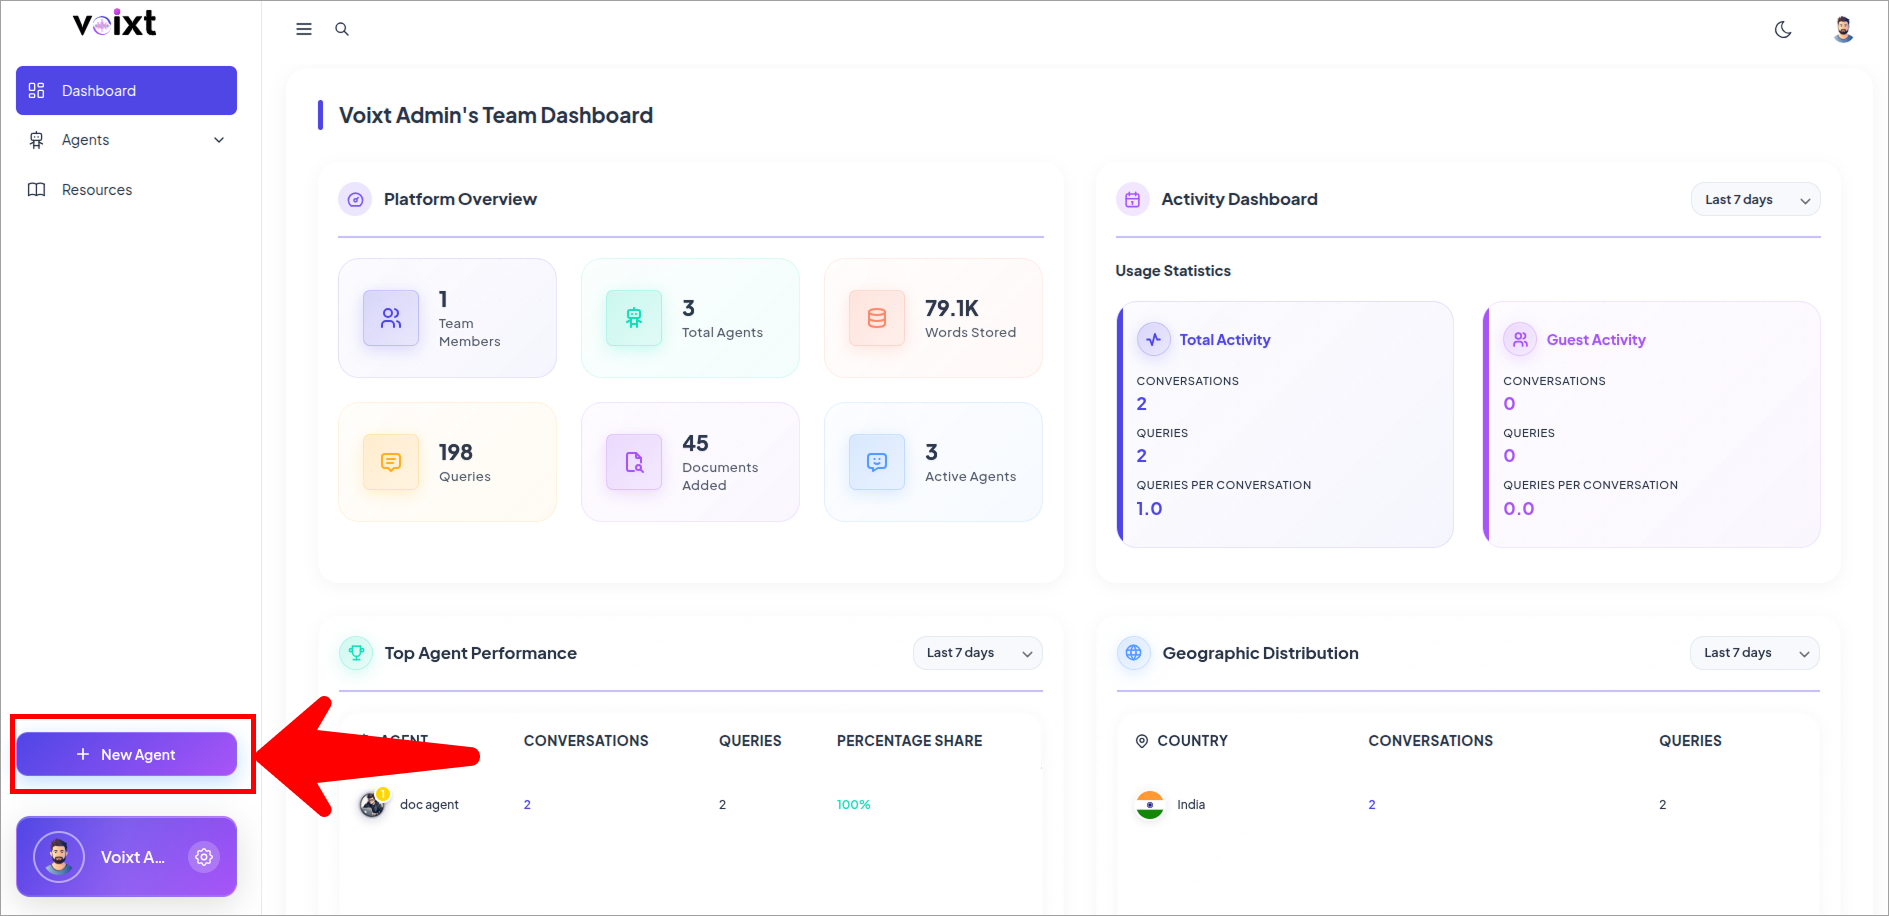
- On your dashboard, click New Agent.
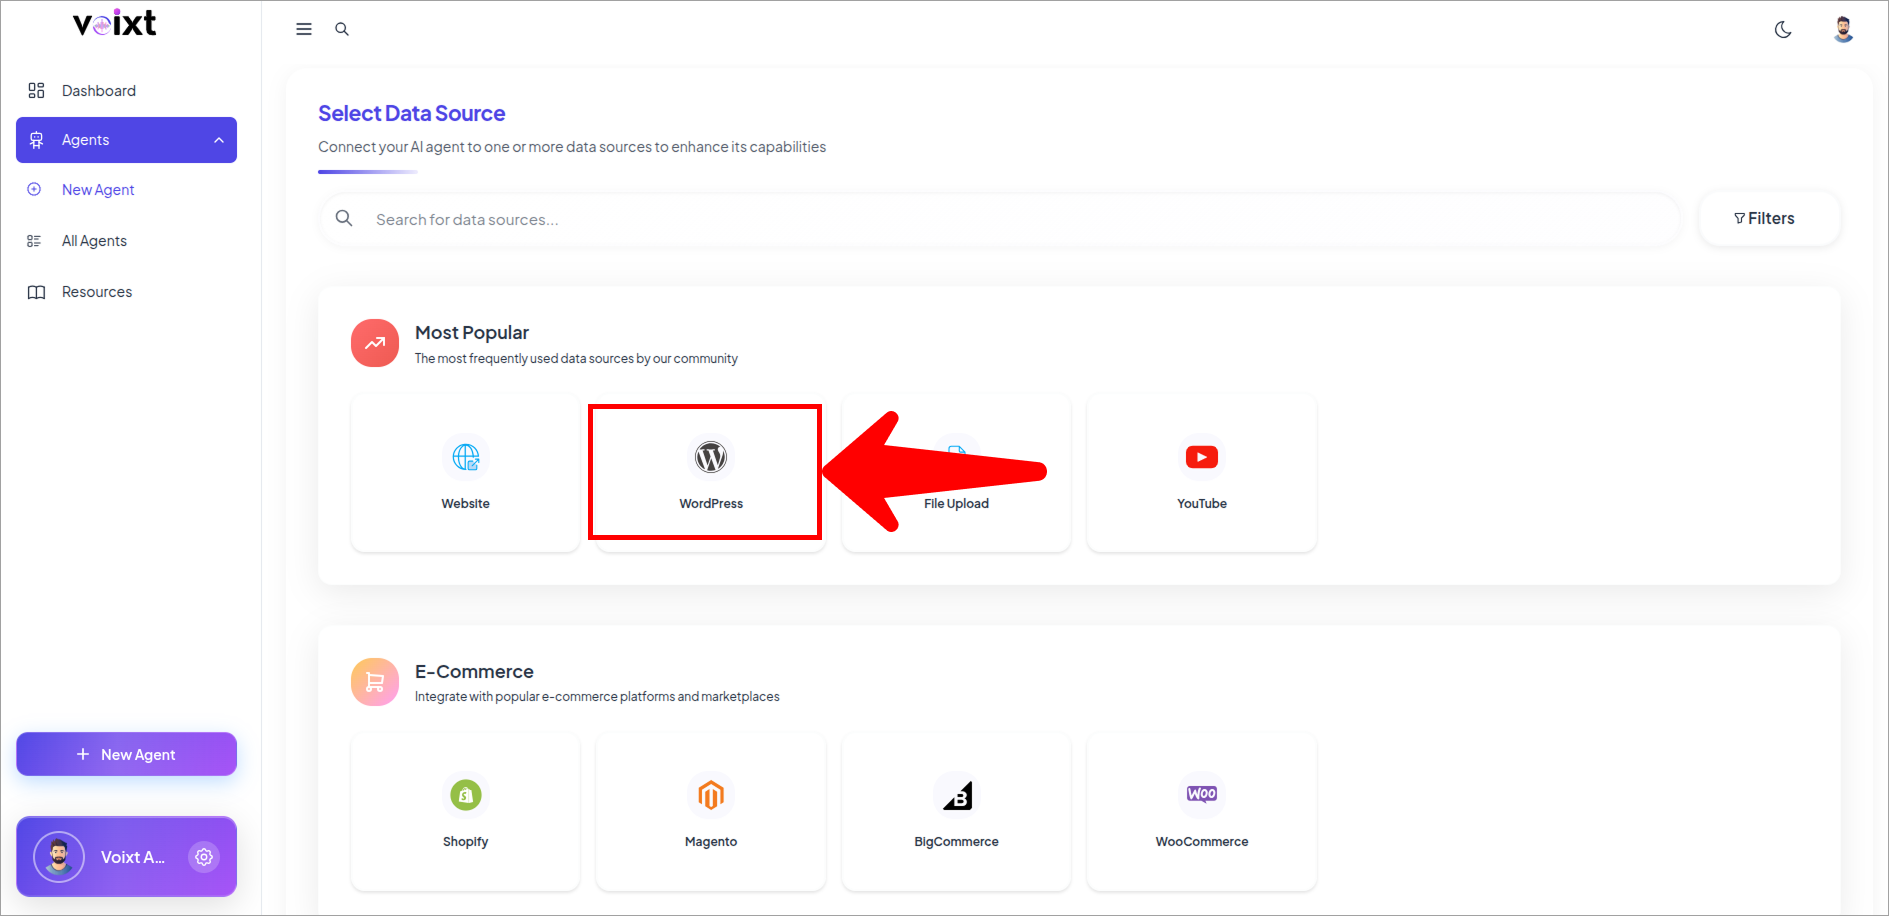
- Select Wordpress.
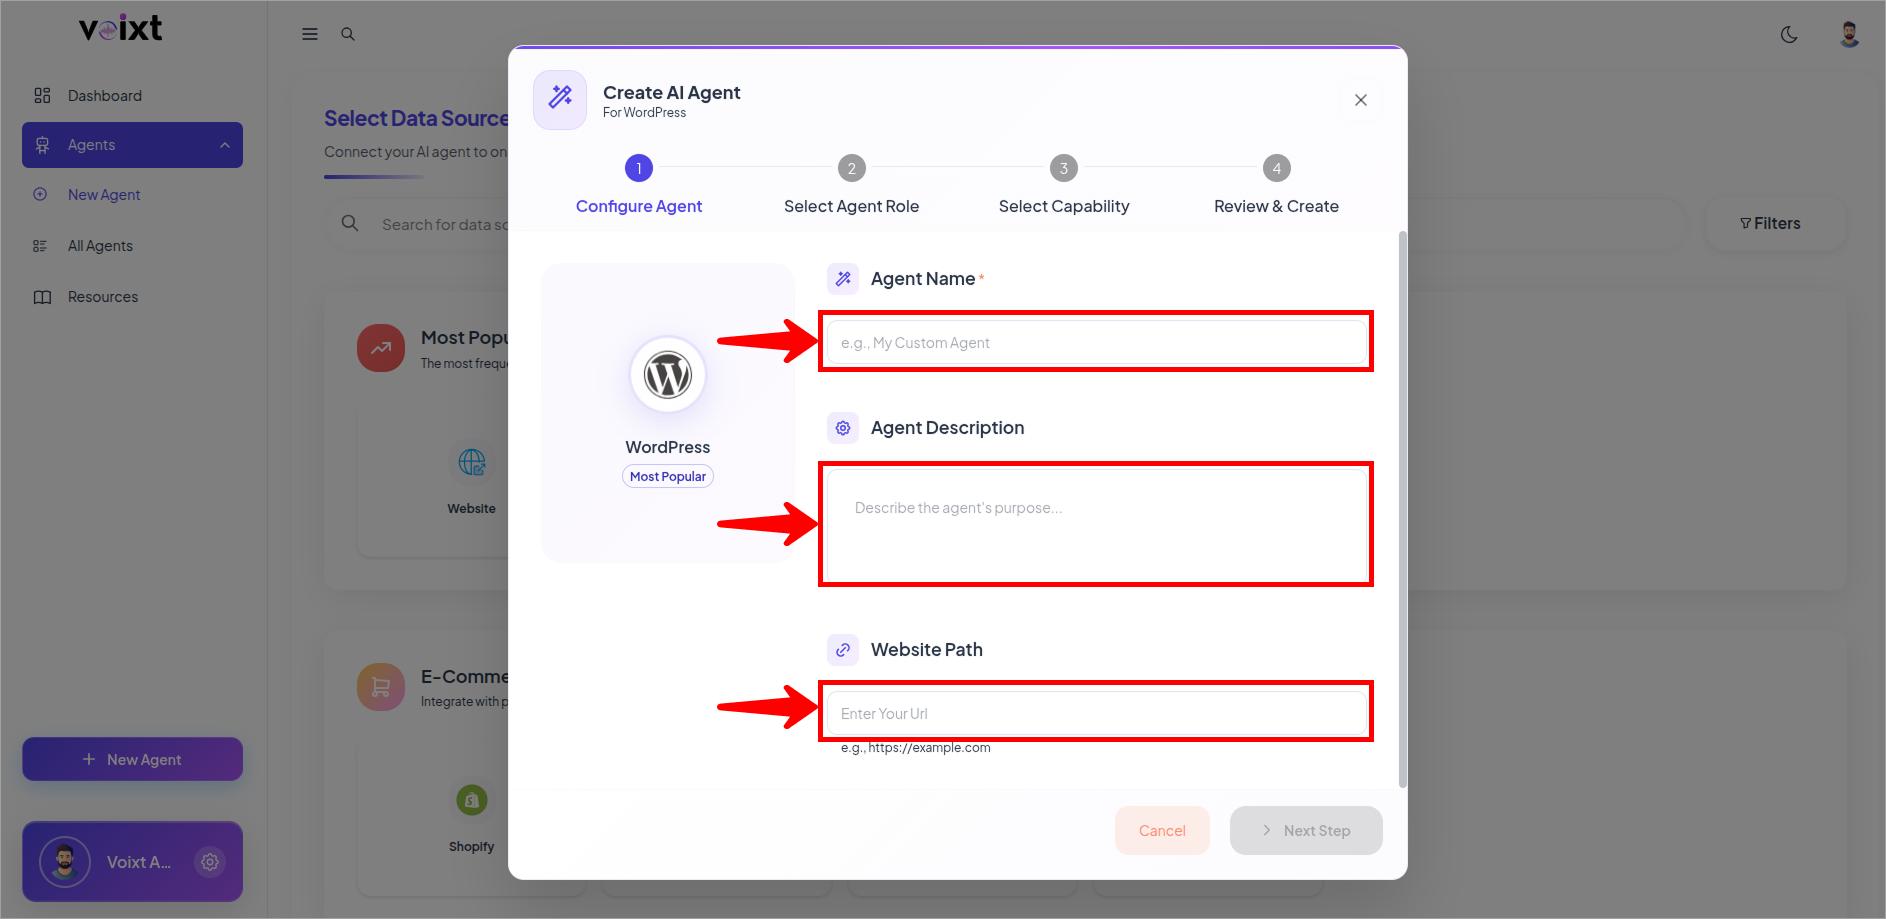
- Fill the details for your agent fields like name, description and the path of the URL.
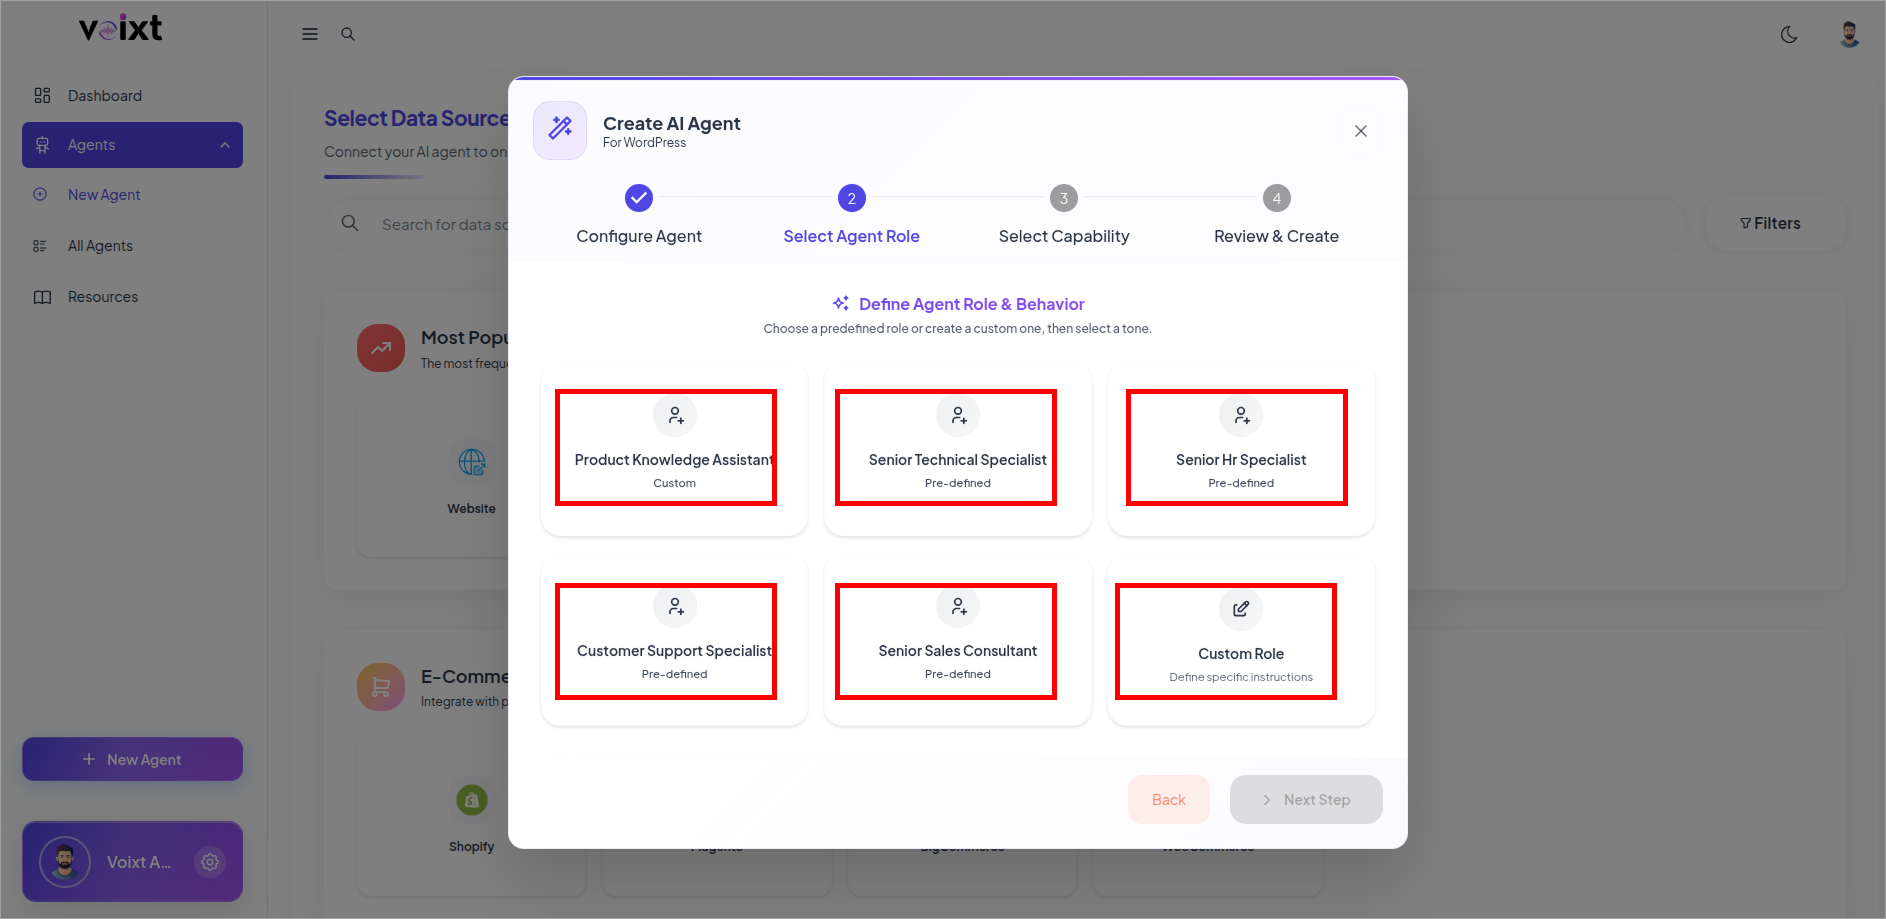
- Select the Agent Specific Role.
tip
You can change all the customization details later as well Check this Agent Customization Guide
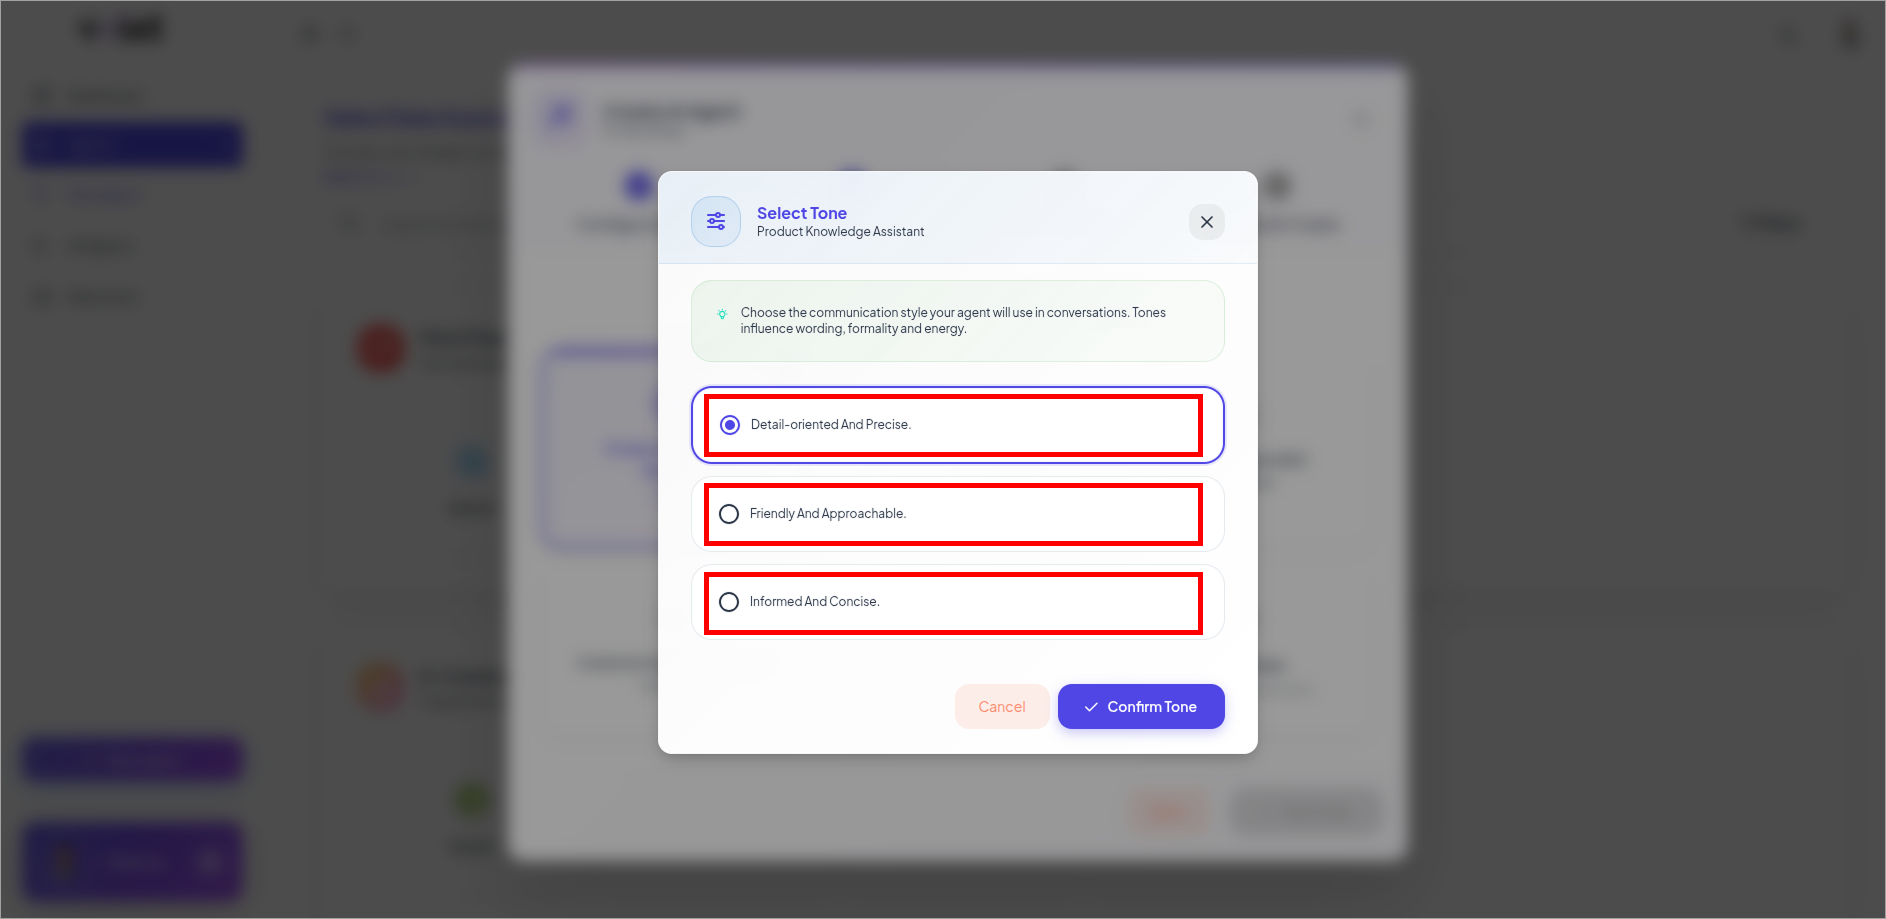
- Select Tone for your Agent.
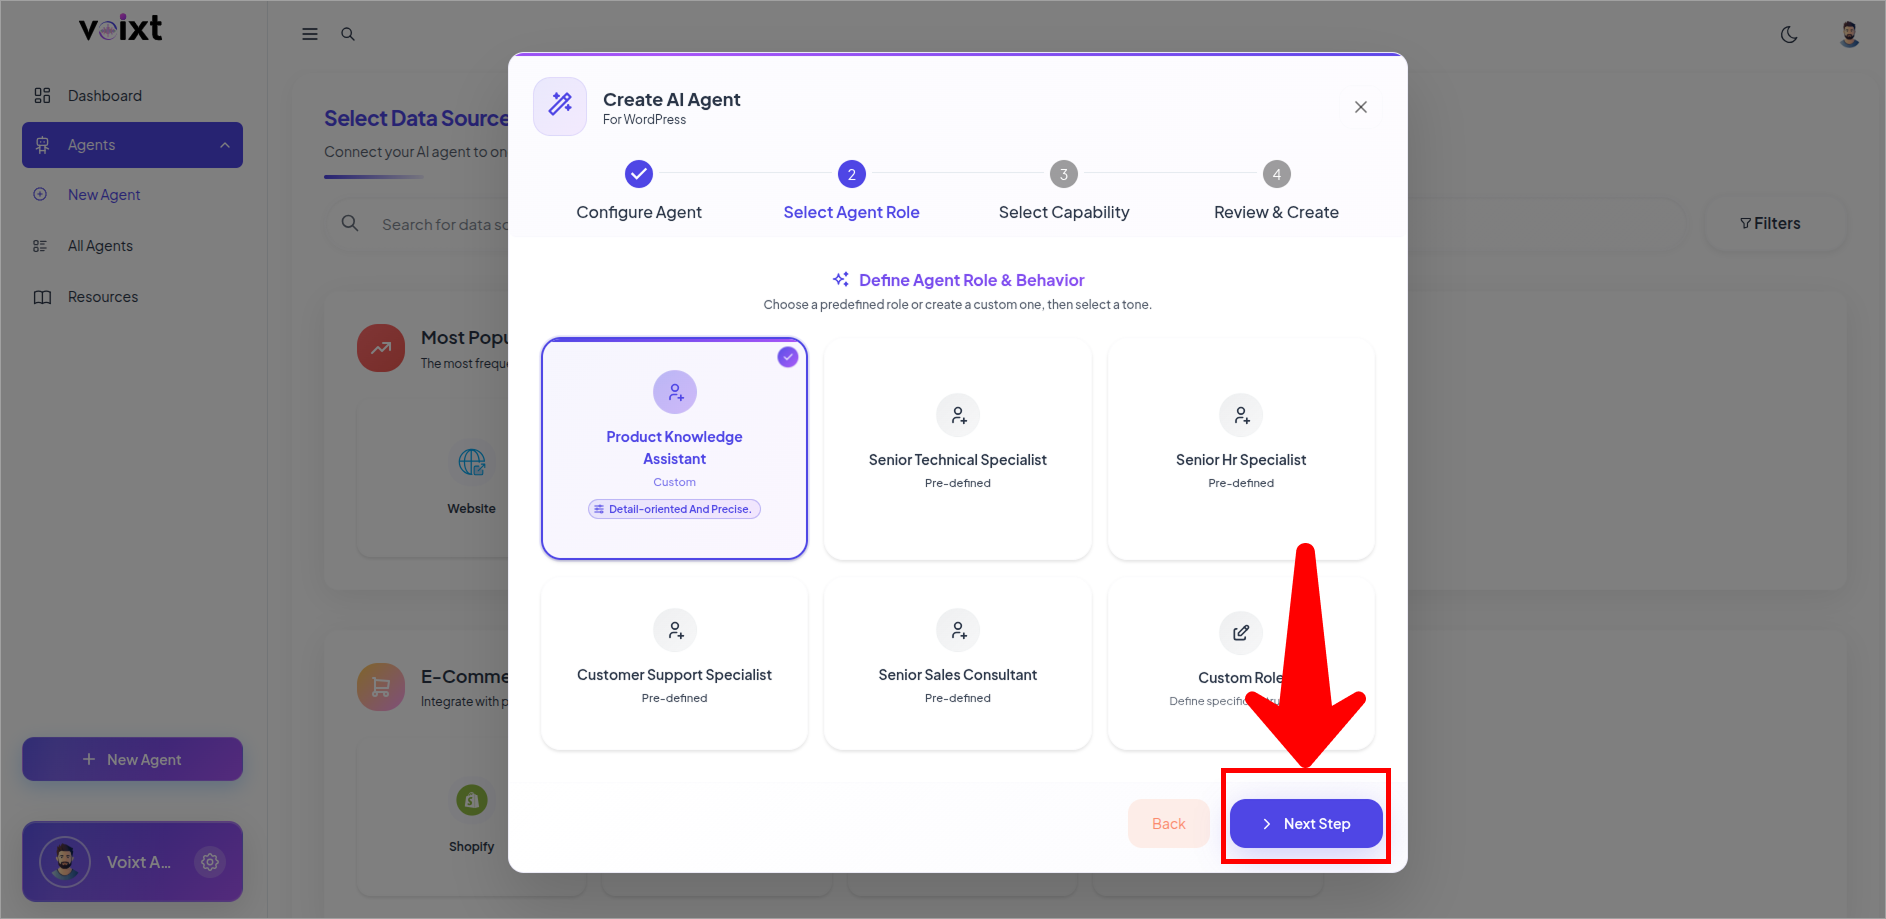
- Review Role and Tone then click on next step.
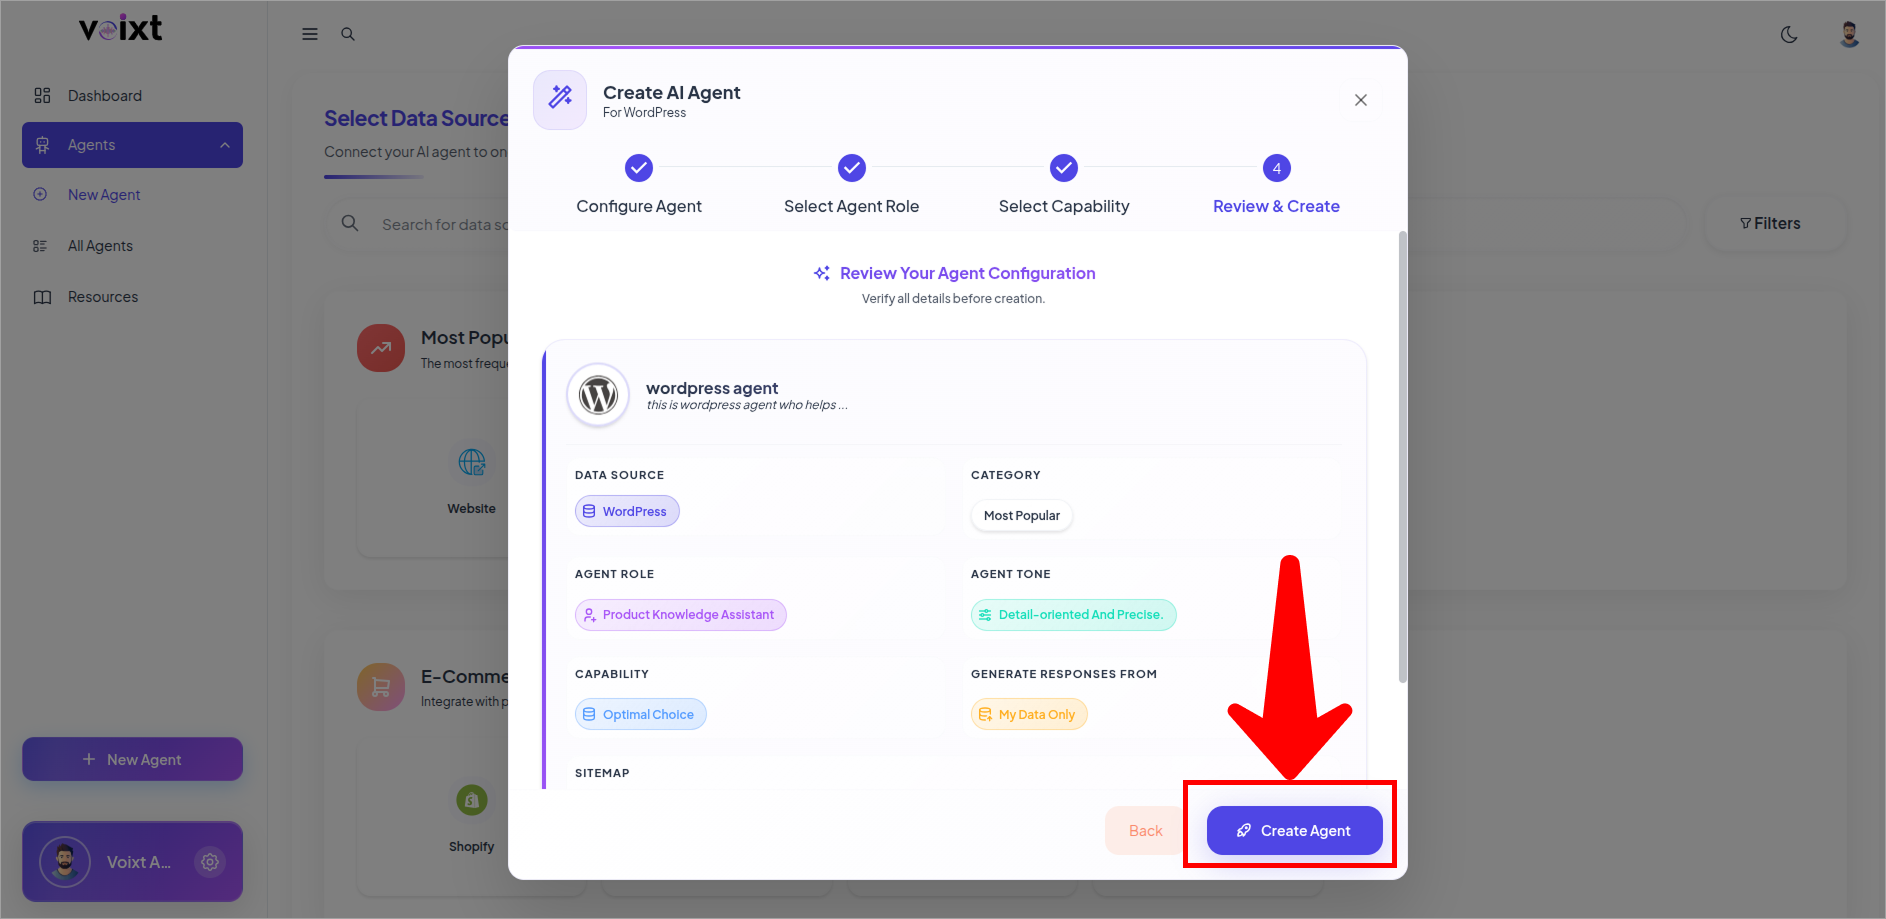
- Configure Response GeNErated from and the Primary capability of your agent and click on next to continue.

- Review the details and click on Create Agent.
- After the creating Agent you'll be redirected to the documents tab of build section, review the pages of your website.
tip
You can manually upload docs as well, or connect another sources as well from the source tab.
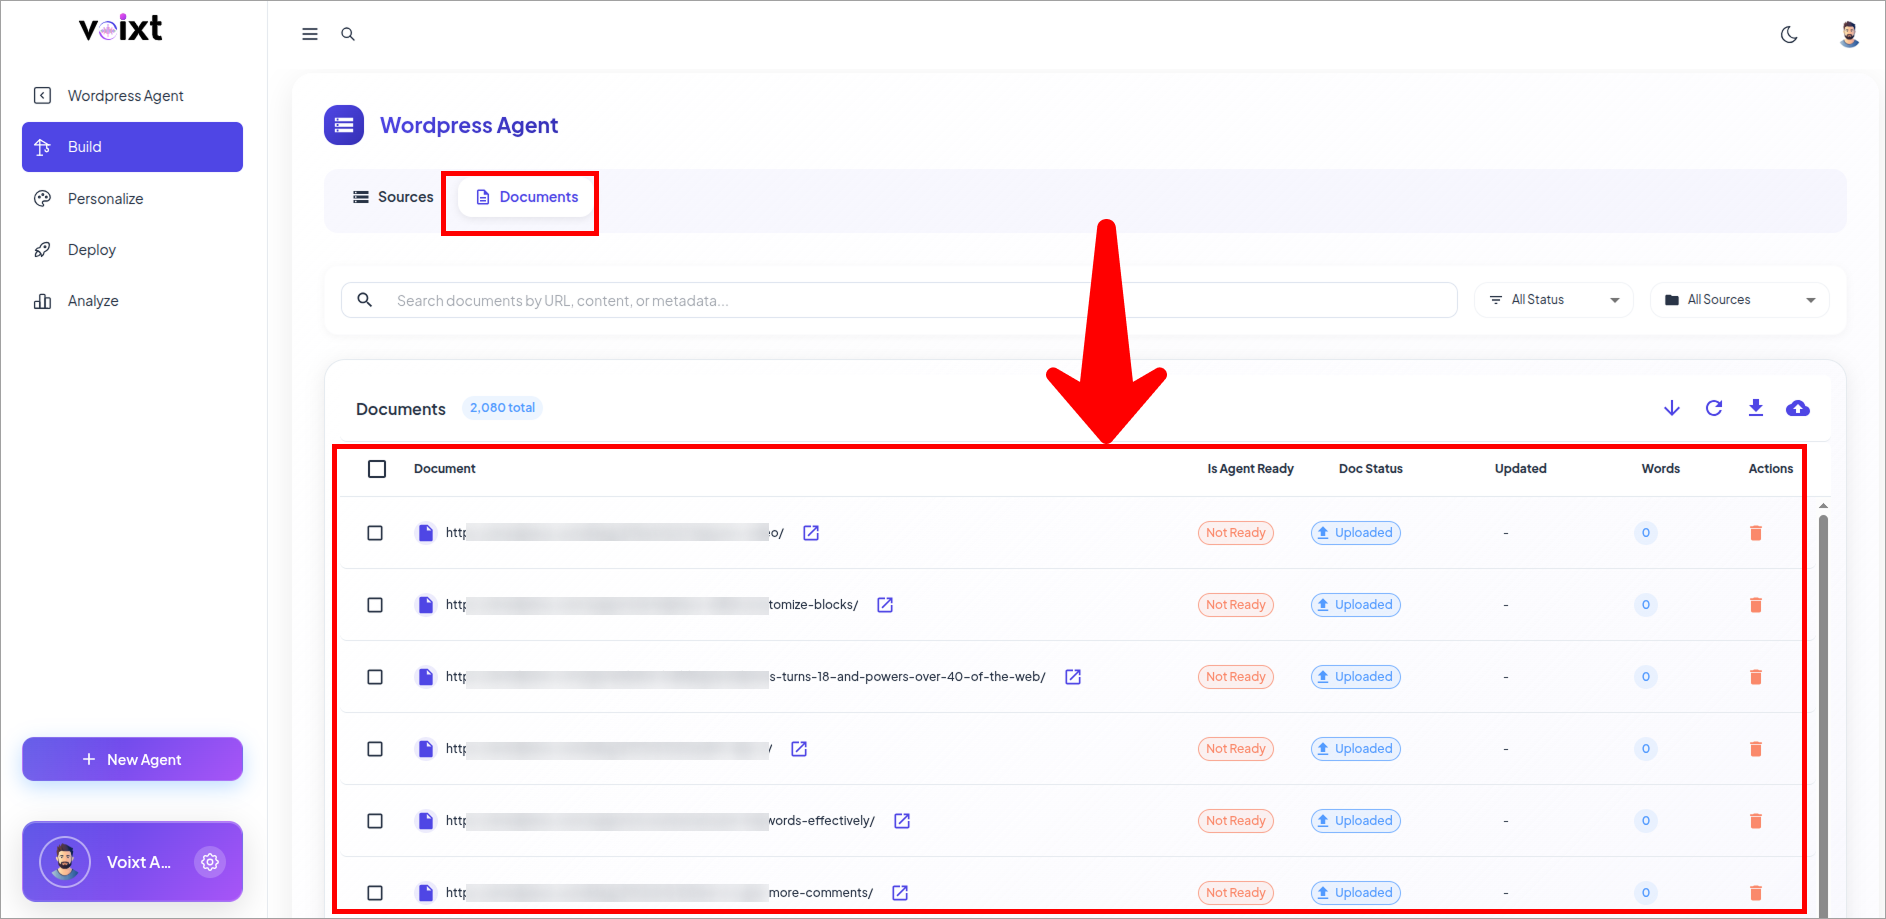
- Click on refresh to check the status of your doc and also check if agent is ready for all the specific docs.
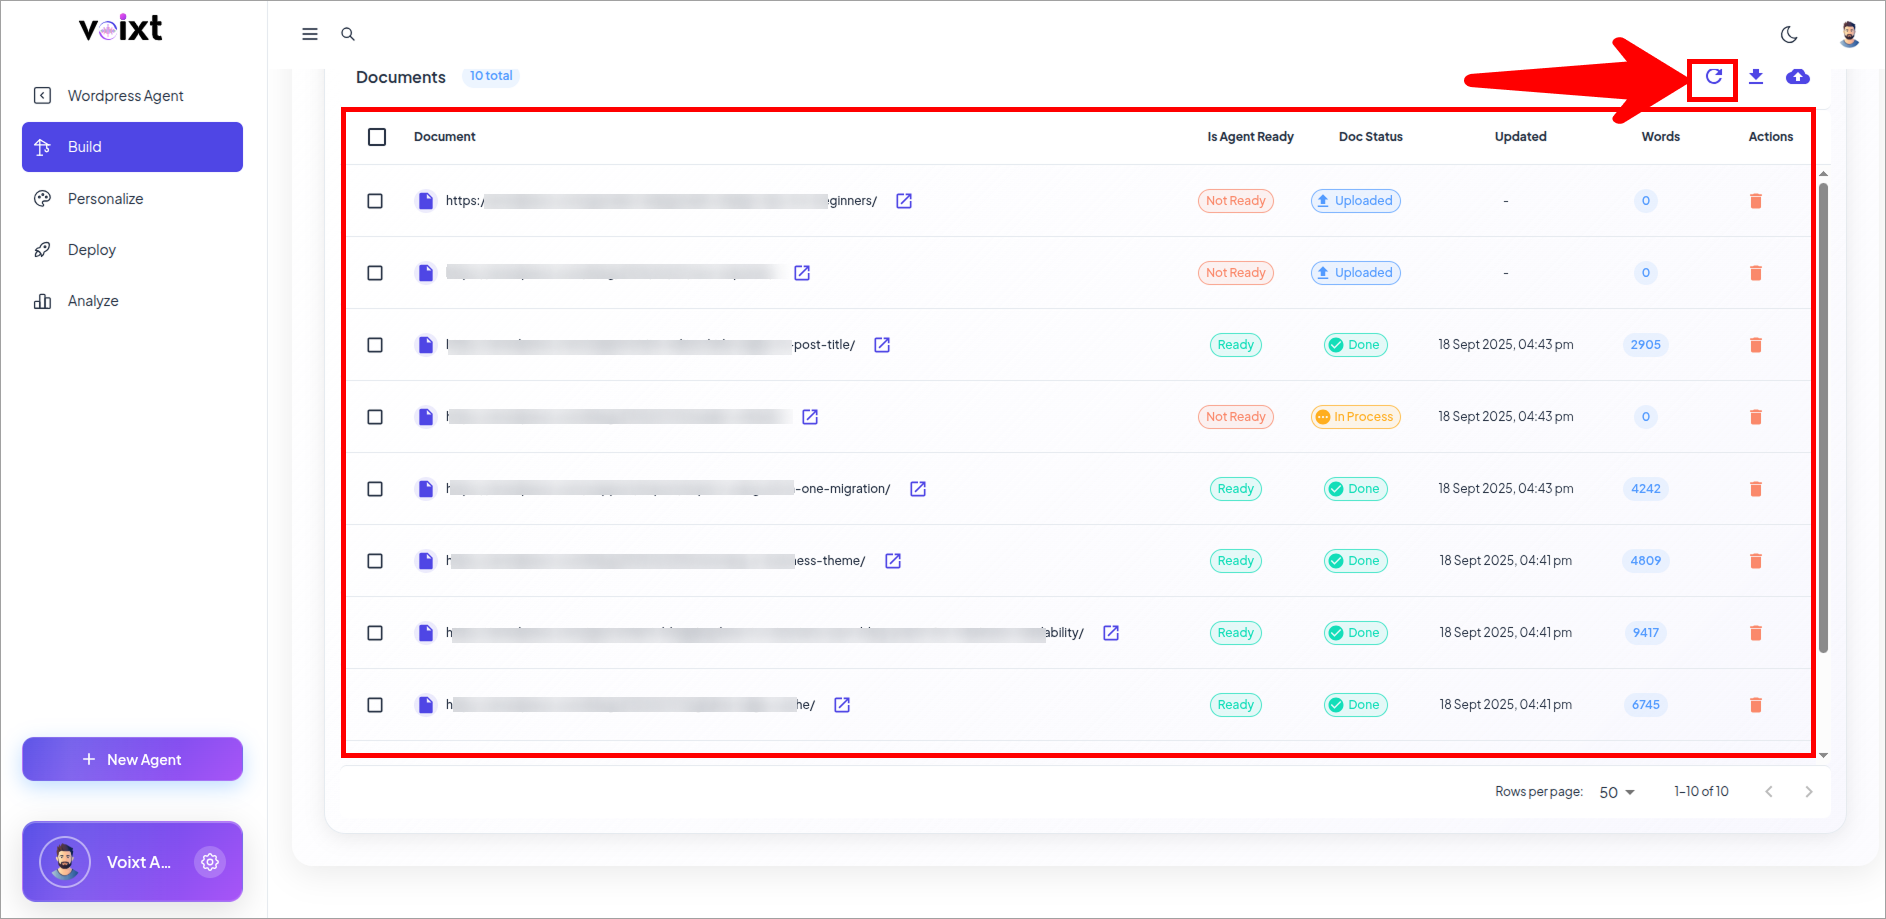
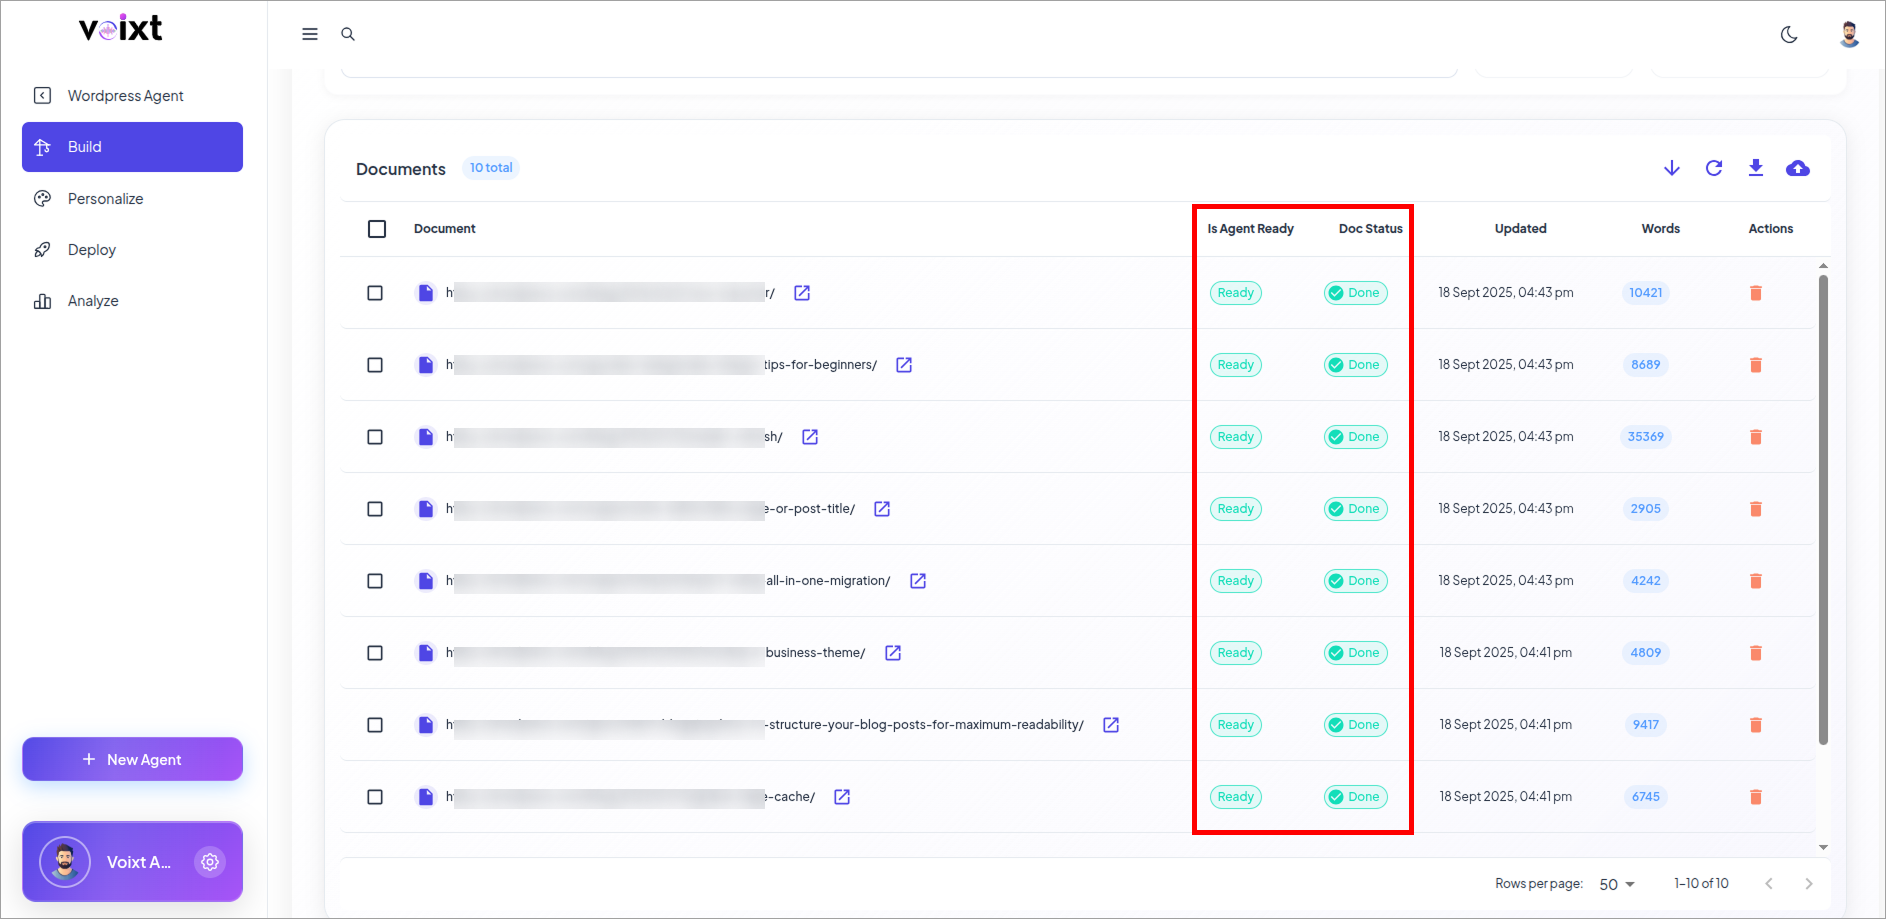
- Check all the doc status Done and Is Agent Ready Ready status.
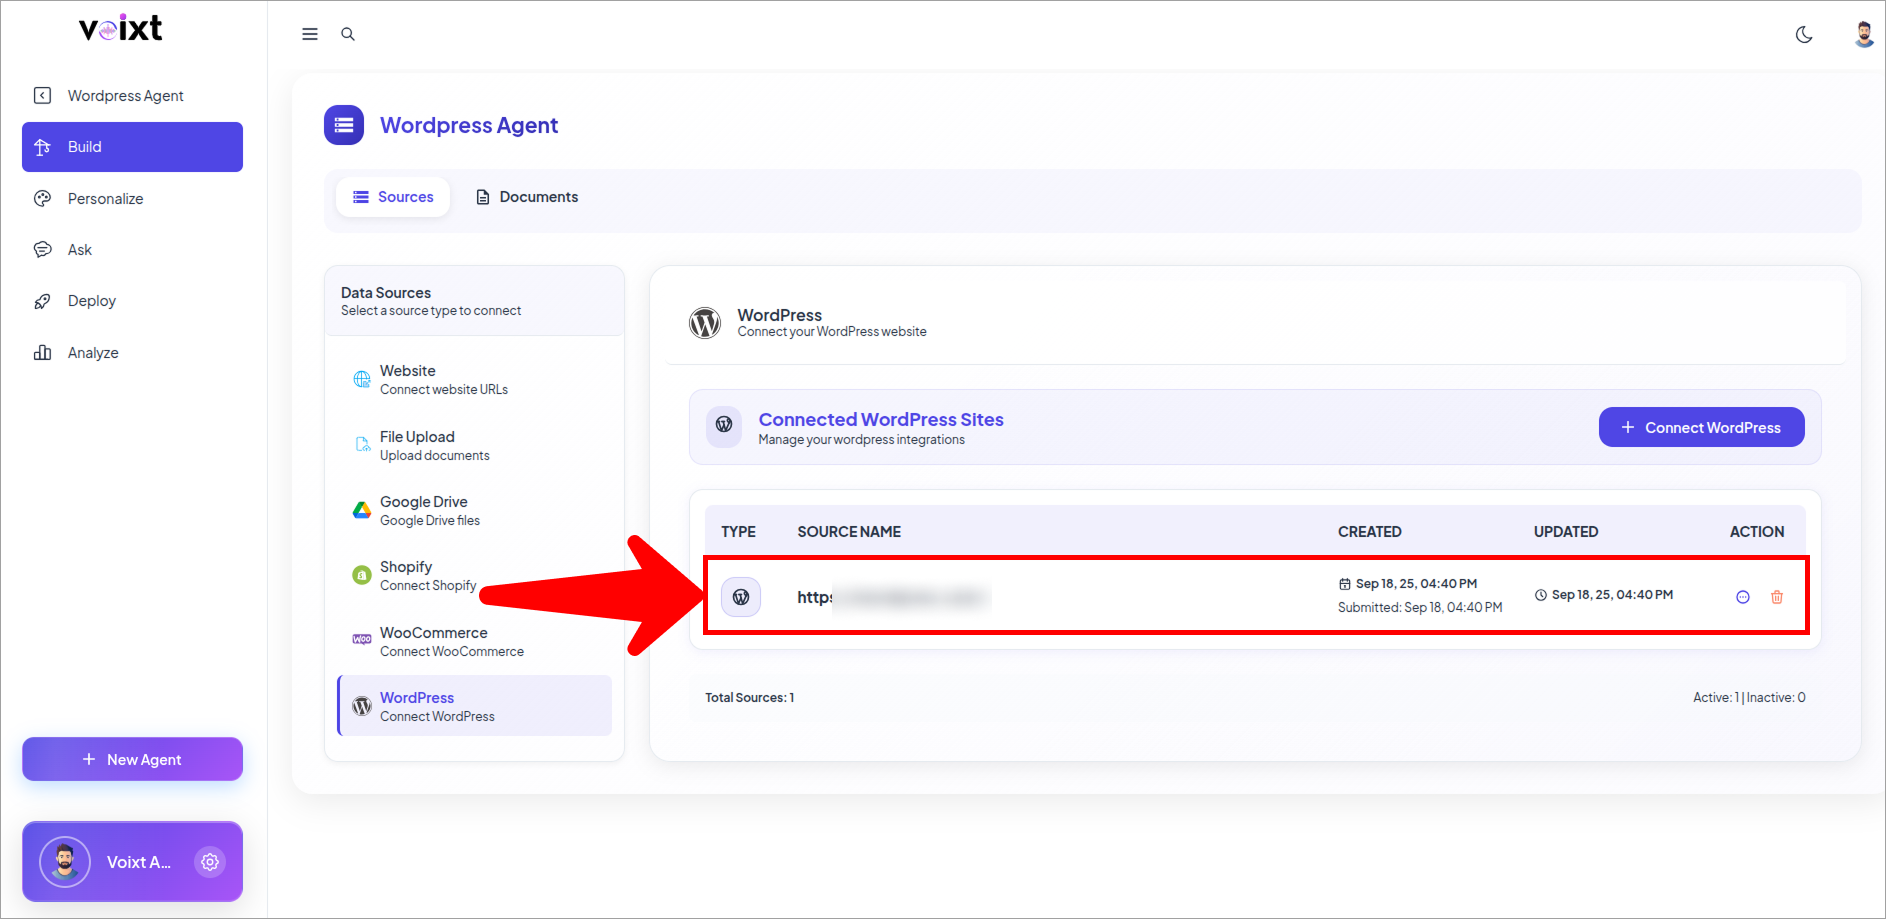
- You can always update, delete or add source and validate your source of wordpress.